Yahoo Mail Notepad Learning how to use
Yahoo is known for offering a quite extensive and useful set of services for some time now, which include obviously email but also others that are considered valuable around the world, such as Yahoo Mail Notepad, Yahoo Finance, Yahoo Sports, Yahoo Messenger and Yahoo News that bring a lot of informative material to users from reliable sources.
Not being enough with that, Yahoo on its renewal has added some other features and tools that can be used directly through Yahoo Mail as based platform, in order to provide a more integral and general approach of service. One of these instruments is the notepad, as a tool that browsing the web can be very handy at some point to register and save important information.
In fact, Yahoo´s notepad takes advantage of cloud features and every note saved will be saved and shown in any devices from which the user log in, local or portable and on real time. In this way, important information kept on the notepad is available anytime, anywhere. Let us talk to you about Yahoo´s notepad in more details and how to use it and take advantage the most of it.
Logging in to have access to Yahoo Mail notepad
In order to have access to Yahoo mail notepad and take advantage of everything it offers, the first step we must take at least the first time is to open session on Yahoo Mail. To do it, we can access the URL address www.login.yahoo.com and enter the email address and password, getting logged in to the inbox to follow the next steps.
Now that we have opened session on Yahoo Mail and we are looking at our inbox, to access the notepad we just have to click on the icon placed at the right of the screen, along with Calendar and Contacts icon.
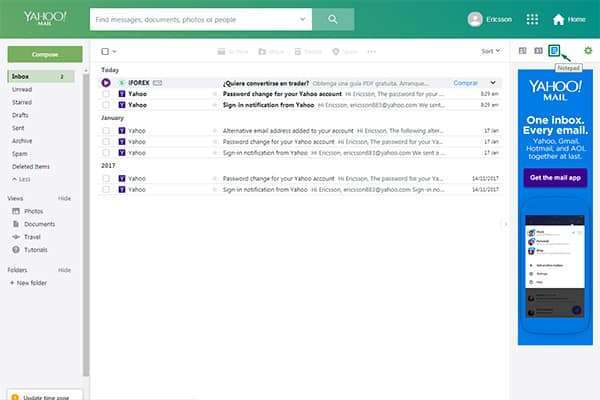
By clicking on this icon the notepad will be opened on another completely different window or browser tab, depending on if we are using Chrome, Mozilla, Edge, Internet Explorer or Safari. In any case, Yahoo mail notepad will opened independently as another platform, where we can finally start using it.
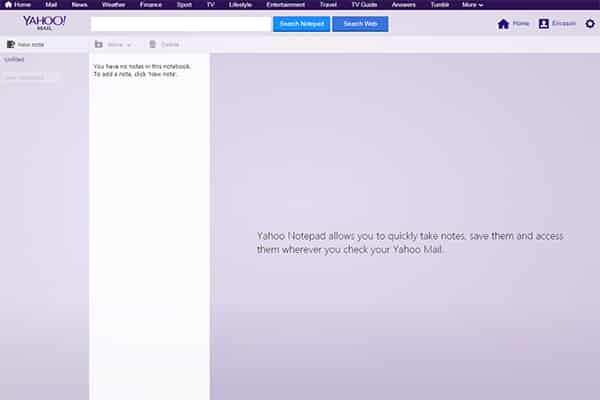
There are a number of great possibilities with the notepad service offered by Yahoo, from the creation of new notes and their editing process to add completely new customizable notebooks and so much more, as easy step we will be following in next.
Creating new notes on Yahoo mail notepad
To start using the Yahoo mail notepad we must have clear that there are plenty of options that are quite straightforward, as a platform that is always divided into three main parts; to the very left of the screen we have the notebook panel where default and customizable notebooks are placed.
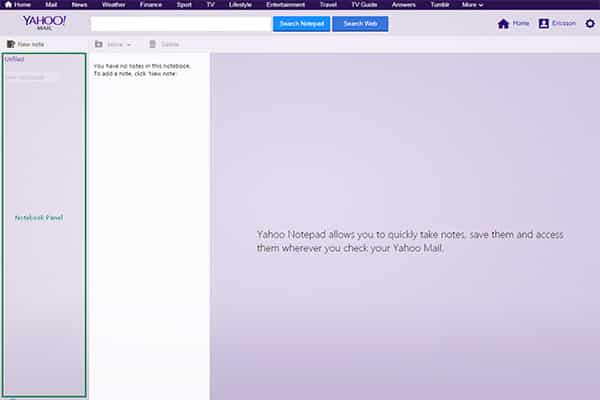
Secondly, more to the center we have the notes panel where all notes from the selected or specific notebook are shown at once and in order. This is particularly useful in multitasking since while we are using or editing a note the others are available on the notes panel at first sight.
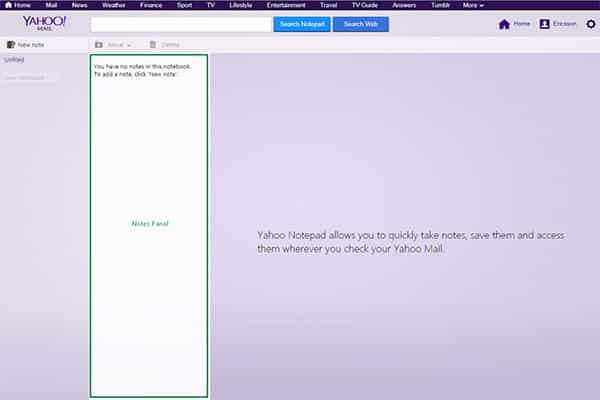
Thirdly, to the very right and with the most available space we have the content panel, where the text of every selected note is shown in this segment for reading and also for editing. It should be noticed that the content appearing in this part of the layout is only the one included on the selected note on the notes panel.
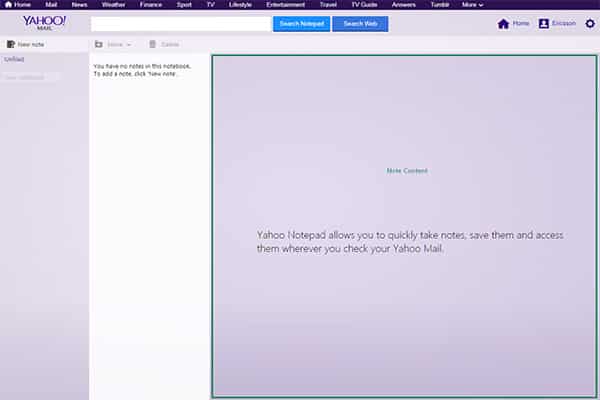
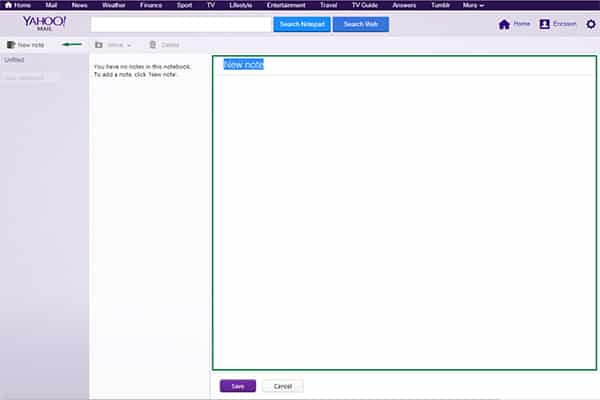
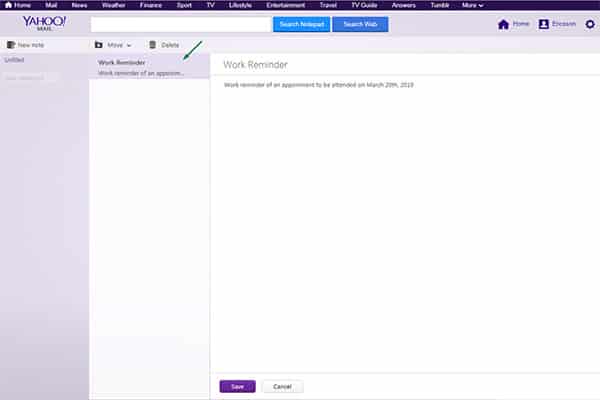
Now that is has been clarified let us start creating new notes. To do so, you just have to click on option “New note” right on top of the notebook panel. By doing so, the editing options will be opened on the content panel to add the note´s name and included text.
In this case we will be creating a new note related to a reminder from work, so its title will be “Work reminder” to be entered at the top of the content panel. Then, we click below and start writing the included content or actual text of the note. When we have finished we click on “Save” and it will be automatically saved.
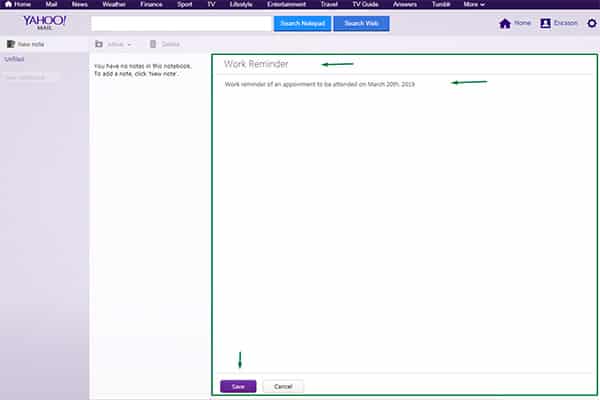
Like this, the new note is now saved and available for consulting or editing options listed on the notes panel.
Creating new notebooks to include specific notes on the yahoo mail notepad
On another part, the same way you can create new notes you are able to create new notebooks to save specific types of notes that can be related to work, personal life, reminders, tips, studies or any other. Like this, you as a user can have a more organized notepad that translates into a more useful one that saves time and is more efficient.
Now, to create new notepads is even easier than creating notes; just click on the option “New notebook” on the notebook panel and then write the new notebook´s new name and that is basically it. In this case we will be creating a new notebook for study notes.
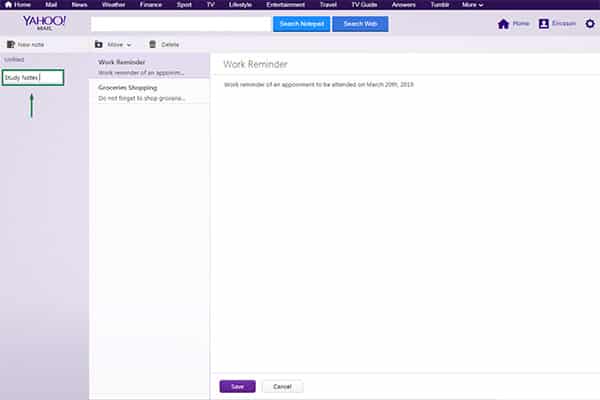
In this way a new notebook is now available for specific use and every new note created while such notebook is selected will be save on it.
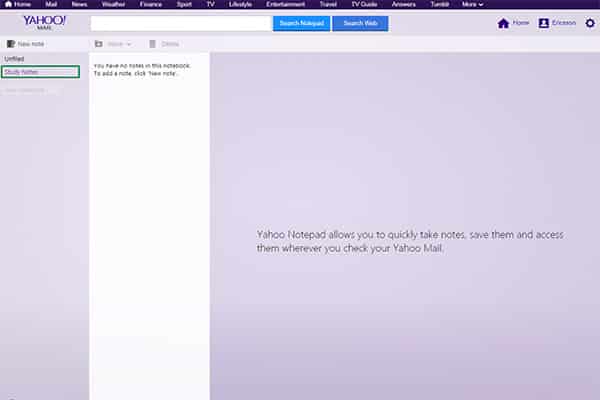
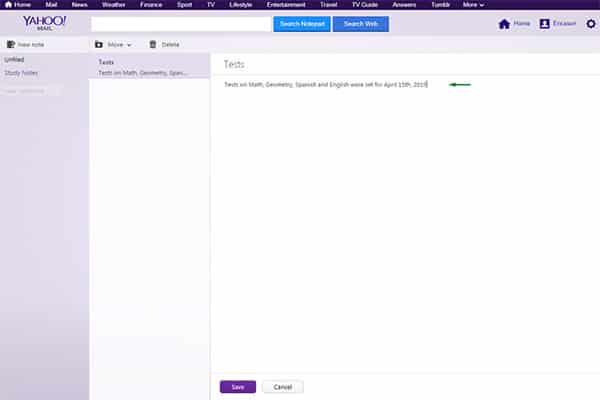
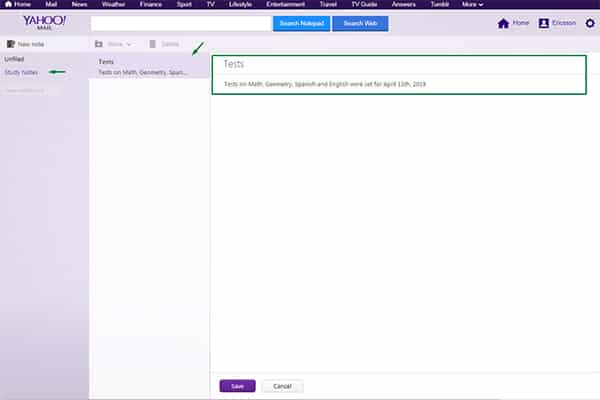
For example, while the “Study notes” folder is selected let us create a new note that will be called “Tests” and include important information about test dates and more. By clicking on “Save” such note was saved on the selected folder, which in this case was “Study notes.”
Managing notes on Yahoo mail notepad
In case we have created and for some reasons we need to move them to other notepads or simply delete them because there is no more use to them, the process is very simple to carry out.
First, we select the notepad where the note is included and select it, by doing so a little option panel will be enabled placed at the top of the notes panel, corresponding to different actions we can perform that will affect the selected note.
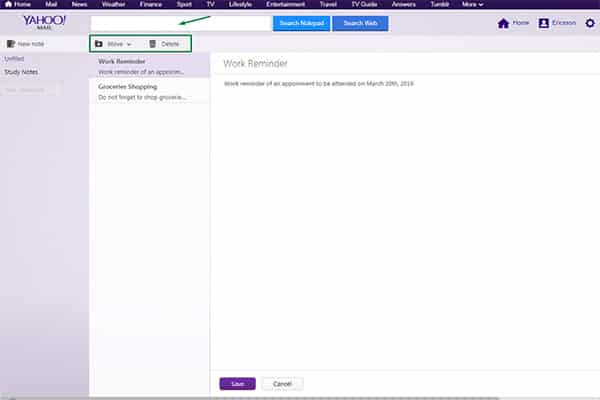
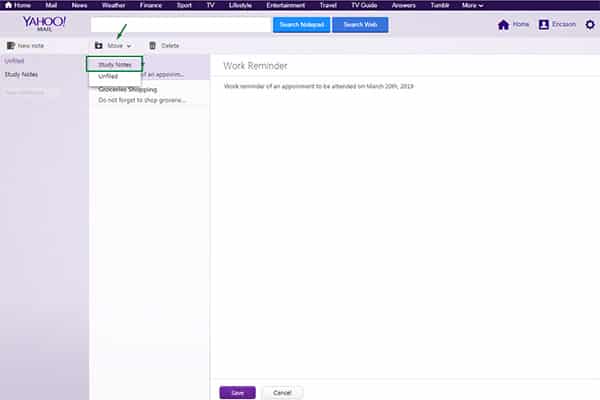
For example, we can move the note to other notebook in case we need to, just by clicking on “Move” and then selecting the notebook where we want to place the note. In this case we will be moving the “Work reminder” note from the “Unfiled” notebook to “Study notes.”
Like this, the note was easily move from one notebook to the other as a great management options to keep the notepad clean and organized.
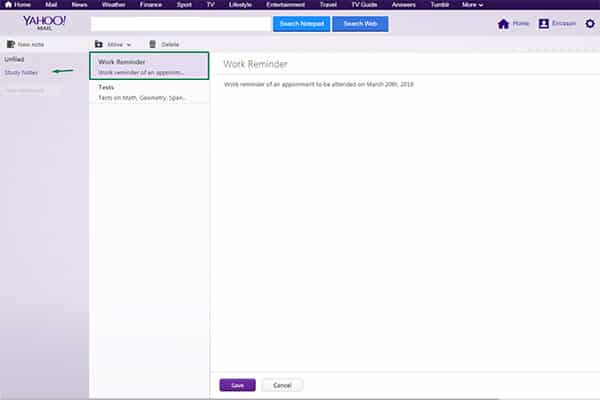
On the other hand, in case we do not need a note anymore for any reason, there are two easy procedures in which we can delete them for good.
The first one will be selecting the note to be erased and click on the “Delete” option, and a new warning will appear asking you if you are sure to perform the deleting process, click on “Delete” again and the note will be deleted permanently.
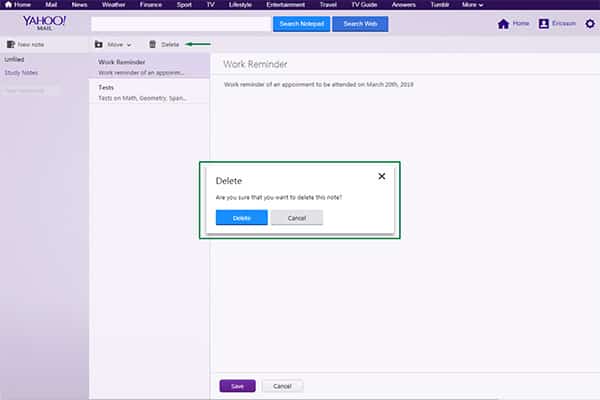
The second deleting process is even more direct and you can do it by clicking only on the trashcan icon that appear when you place the mouse cursor on a note, and like this the platform will ask you if you are sure about deleting it, click on “Delete” and you are good to go.
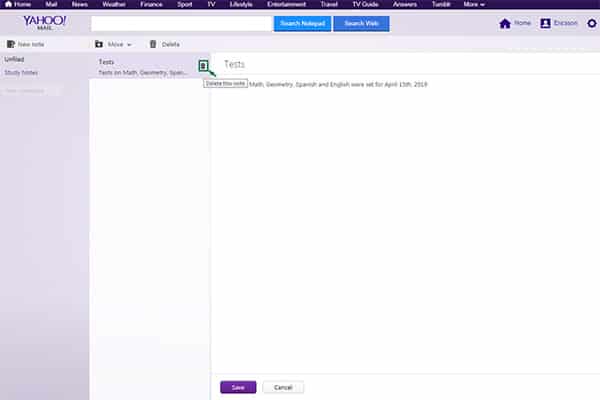
When it comes to modify the notes and their title the process can be done directly by clicking on the note to modify and then on its title or content, enter the new text and that will be it.
