Yahoo mail Plus Domain blocking and disposable email
Yahoo Mail Plus is the premium version of Yahoo Mail, with plenty of advanced and useful characteristics that are exclusive for those users who need fully-featured emailing solutions. Two of the most powerful functions added to the Yahoo Mail´s paid plan is domain blocking and disposable email addresses. We are going to tell all about these premium top of the line functionalities.
What is domain blocking in Yahoo mail Plus and how to use it?
With blocked domains, users are going to be able to stop receiving messages from senders and sources they do not want to. From newsletters to acknowledged spam sources, such domain-related addresses can be blocked quickly and avoid inbox clogging or even malware.
To start using this function, follow the next steps:
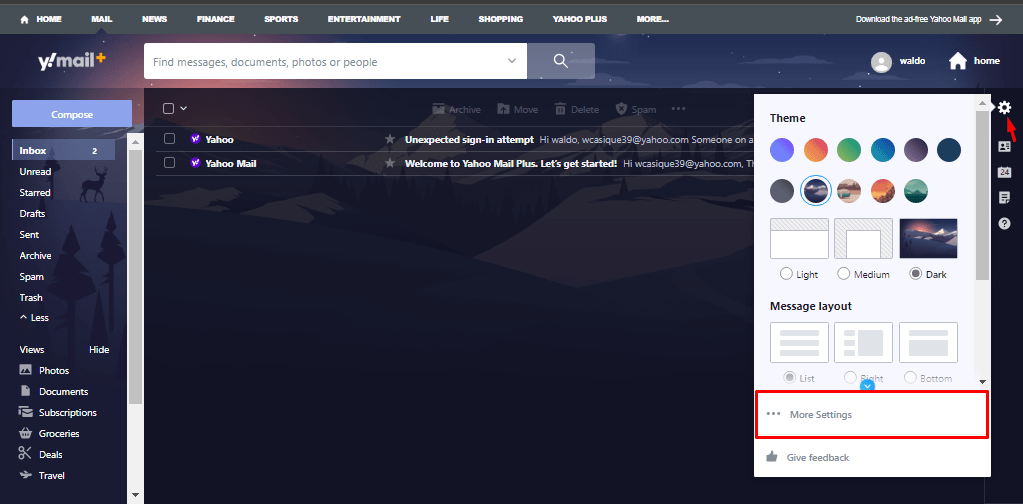
- Open session like you normally would in Yahoo Mail Plus. Go to the right and click on the Configuration button. In the displayed menu, click on “More settings”.
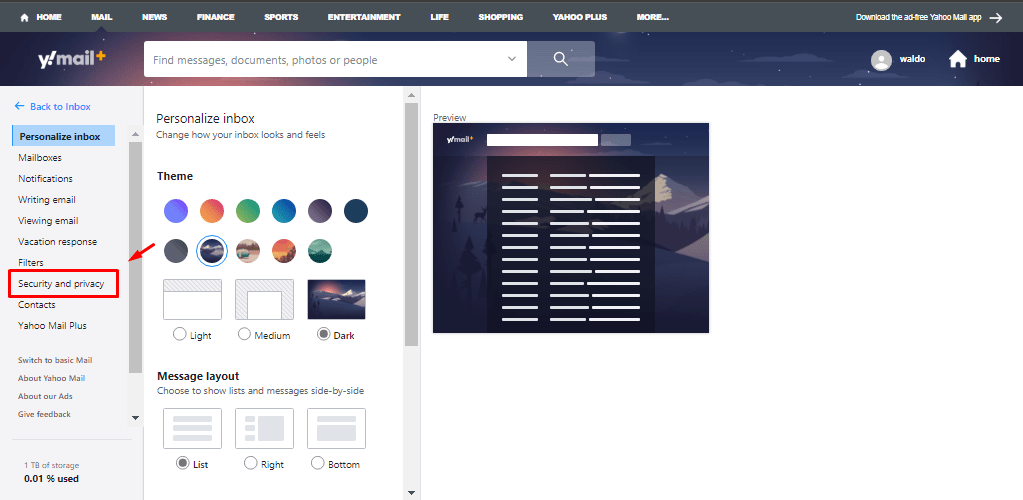
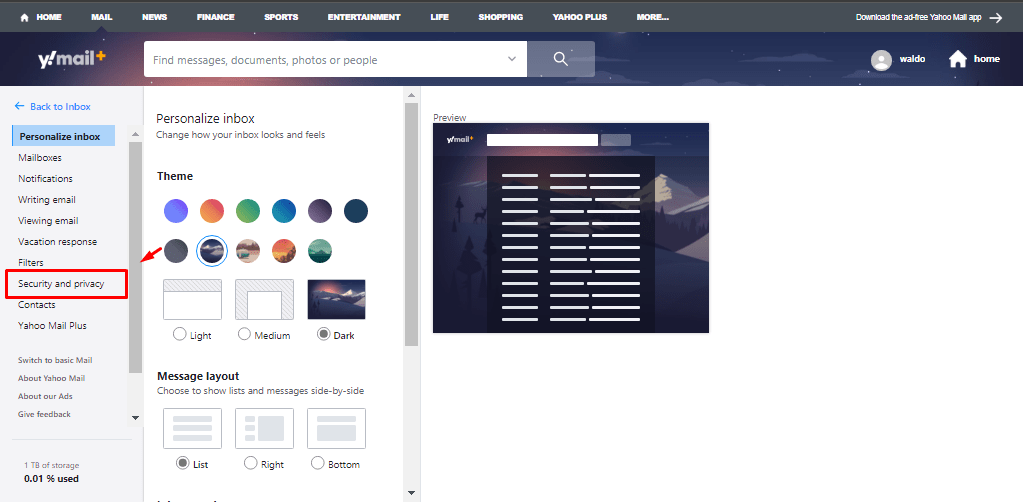
- In the Settings, go to the main menu on the left and click on “Security and privacy”.
- To the right at the bottom, you will be able to see the blocked domain section and available options. Click on “Add” to start the process of adding new domains to be blocked.
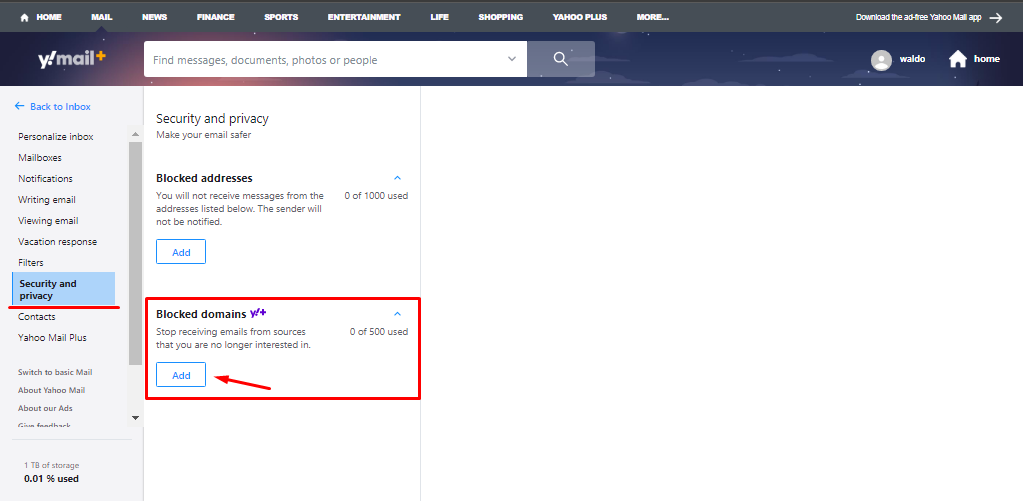
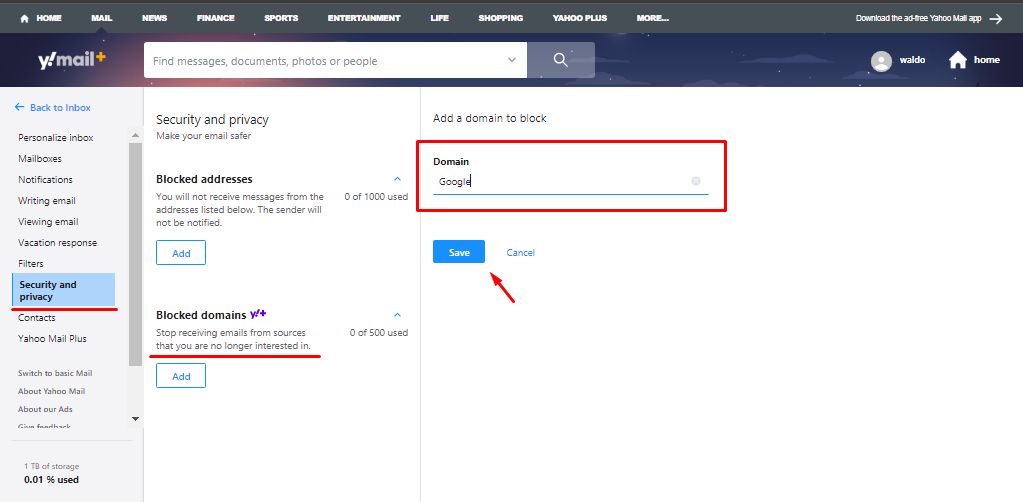
- Type the domain you want to block in the empty space to the right. Let´s say, you do not want to receive messages from email addresses with the “paypal.com” domain. Click on “Save” to finish the process.
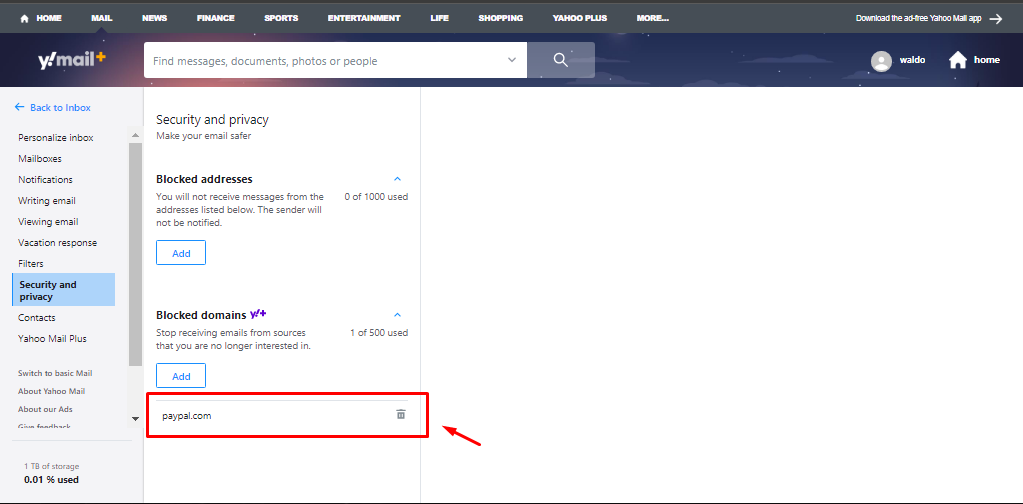
- Now, the entered domain is added to the blacked list as shown in the image below. Now, if you click on the trashcan icon to the right, such domain will be deleted and you can start receiving messages from addresses using such domain again.
Using disposable email addresses in Yahoo Mail Plus
With Yahoo Mail Plus, users get to enjoy powerful features that enhance security and privacy. Disposable email addresses is one of them, and by taking advantage of such function you will not have to give out your real email addresses when you do not want to.
Instead, you give out another temporary account and still can receive messages, but keeping anonymity. Here is how you use disposable email addresses:
- Repeat the first step of the precious process.
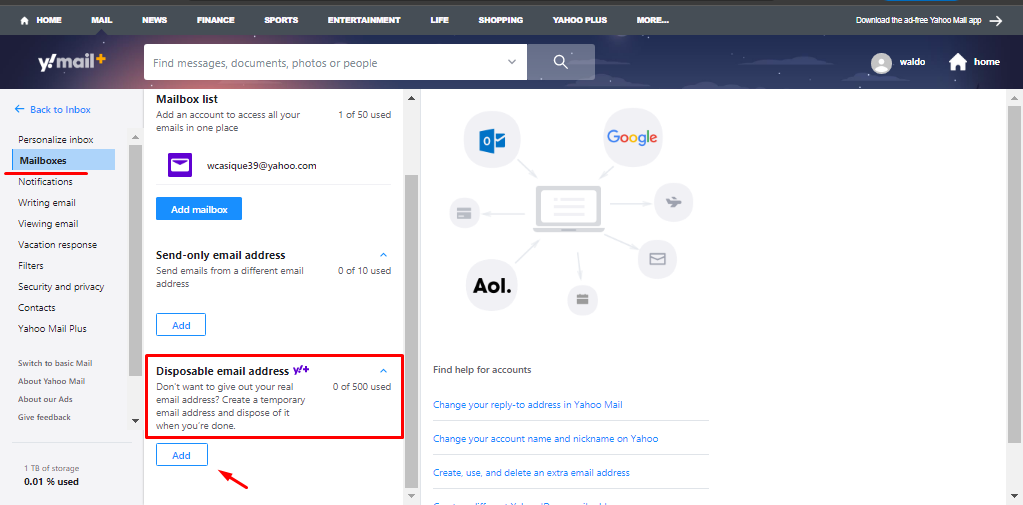
- In the Setting, on the main menu to the left click on “Mailboxes”.
- To the right, scroll all the way down and click on the “Add” option in the Disposable email address section.
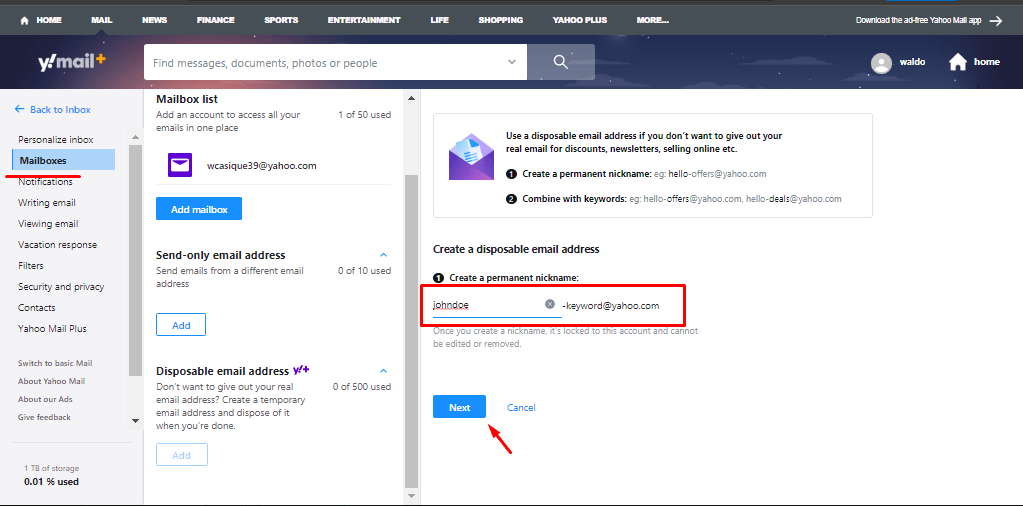
- First, enter a permanent nickname that cannot be removed or changed in the corresponding space. In this case, it is going to be “business2000”. Click on “Next”.
- Now, you can enter optional characteristics to the disposable address. Submit a keyword, a display name and a description. Click on “Save” after finished.
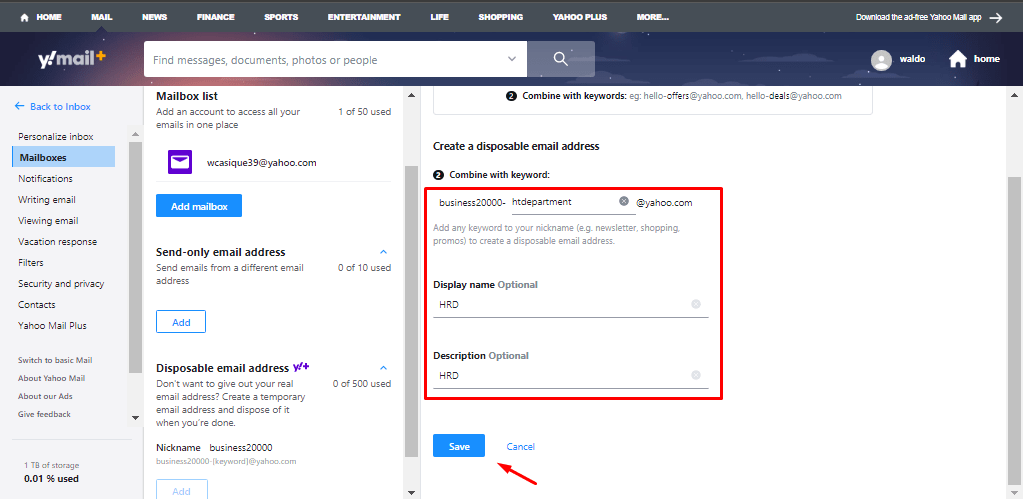
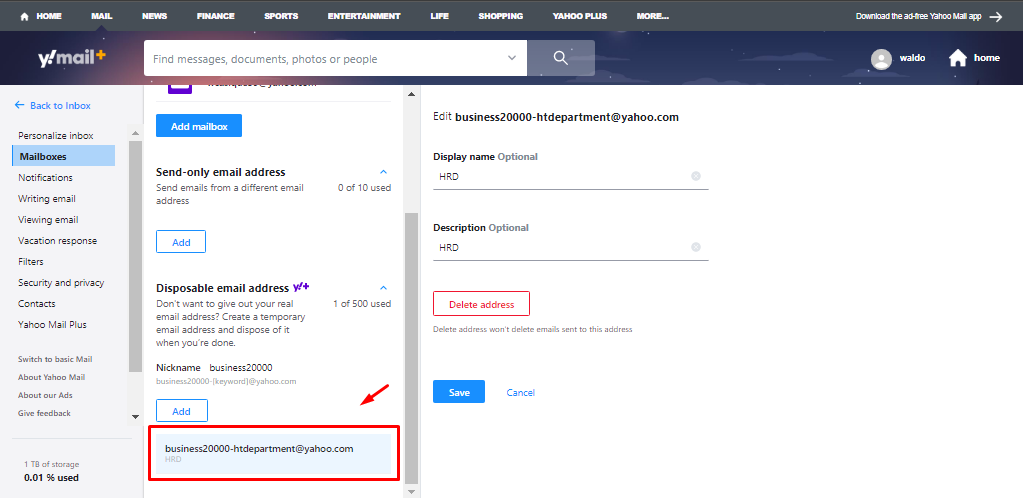
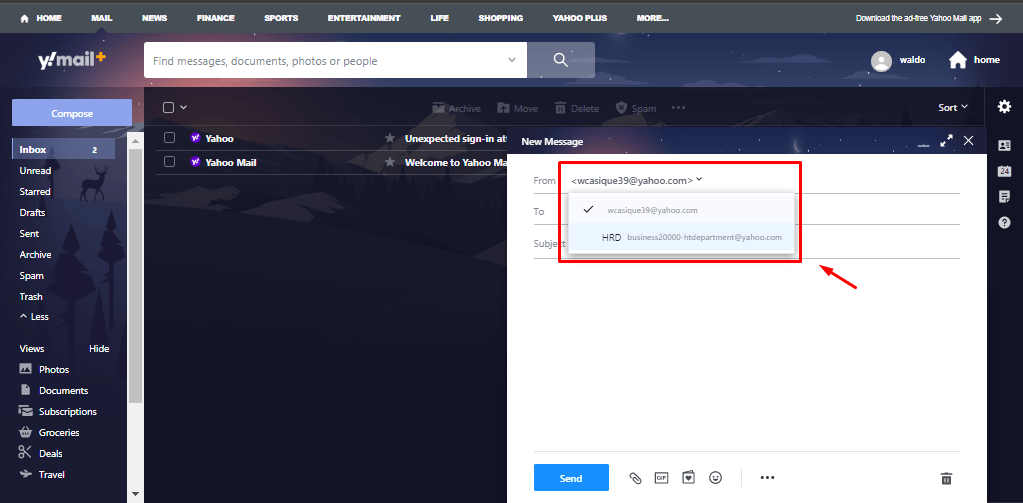
- This is how the disposable address looks like. Now, all you have to do is select your disposable address whenever you need to, and such address will appear as sender.
